Easy Painted Mason Jar Vases for Beginners (Tape and Spray Paint)
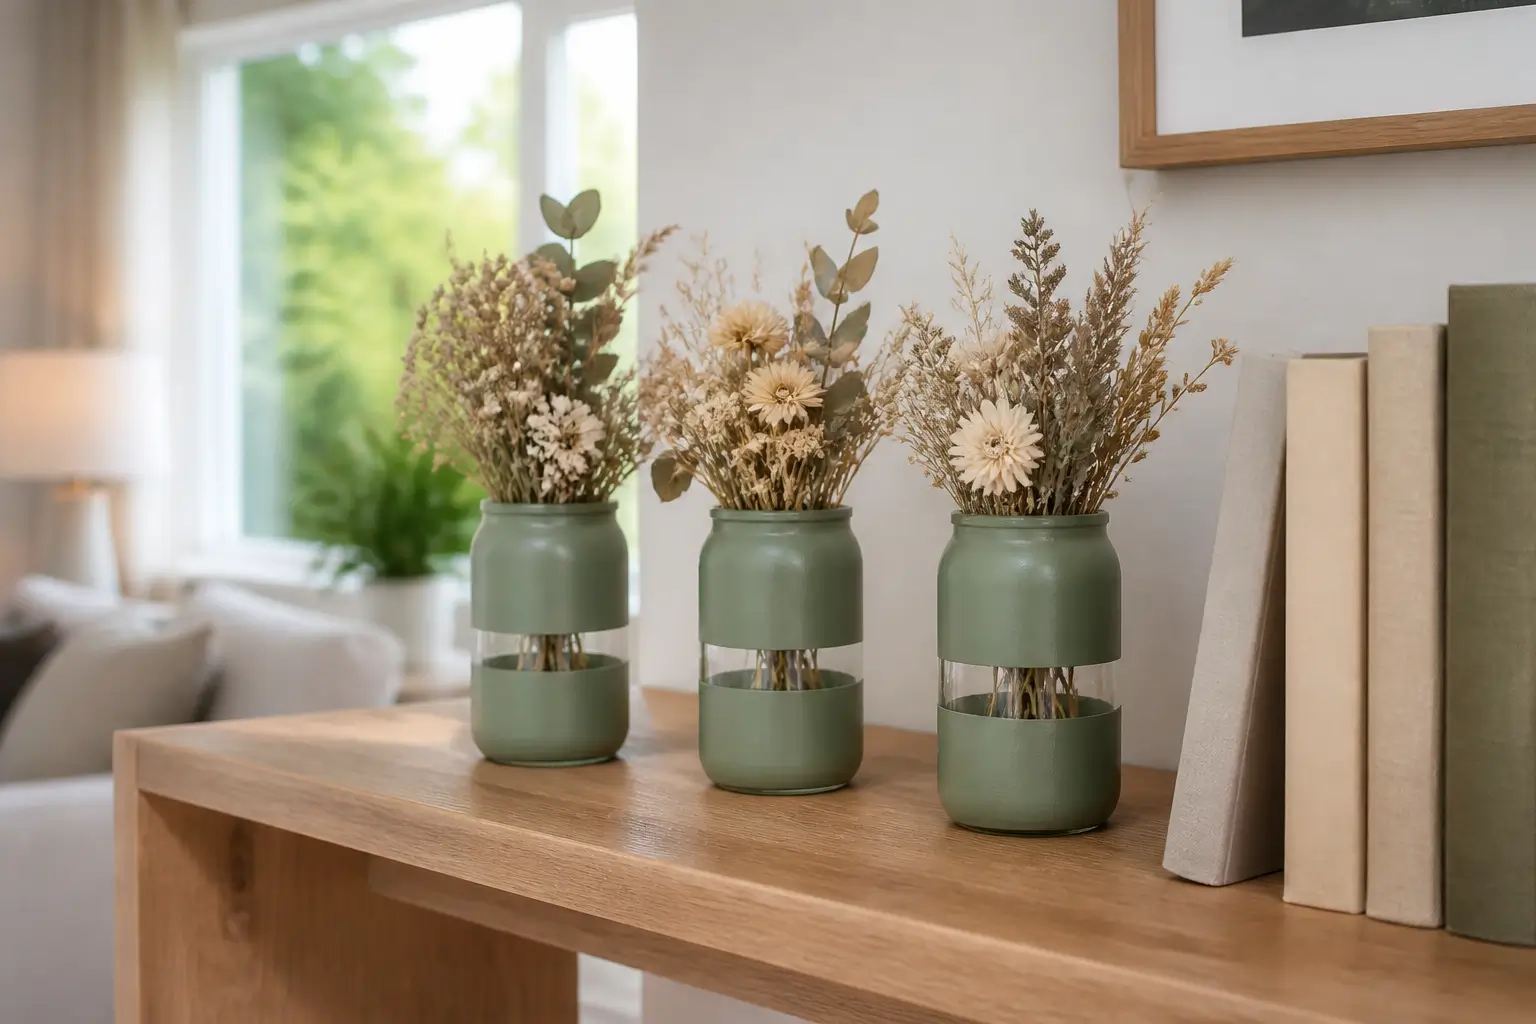
Painted mason jar vases are glass mason jars turned into vases with painter’s tape and spray paint. You tape a simple stripe or band around each jar, spray it in one even colour, peel the tape off when it is dry, and put dried flowers or fresh stems inside. It takes about 15 minutes of active work plus drying time, costs a few dollars per jar, and needs no painting skill.
| Skill level | Beginner — no painting experience needed |
| Active time | About 15 minutes |
| Drying time | Follow the time on your spray paint can |
| Jars per batch | 3 jars |
| Cost | A few dollars per jar, plus one can of spray paint |
| Difficulty | Easy |
Safety first: spray paint outdoors or in a well-ventilated open space, never in a closed room. Wear gloves and a mask, keep the can away from flames, and keep children and pets away while you spray. Let each jar dry fully before you bring it inside or put flowers in it.
What You Will Need
- 3 clean glass mason jars, labels removed, fully dry
- 1 roll of painter’s tape
- 1 can of spray paint in your chosen colour (matte or satin finish works best)
- Old cardboard or a drop cloth to spray on
- Gloves and a mask
- Dried flowers, eucalyptus stems, or fresh flowers
- Scissors
- A dark green fabric cloth as your work surface for the taping steps
Step 1: Clean the Jars and Tape Your Design
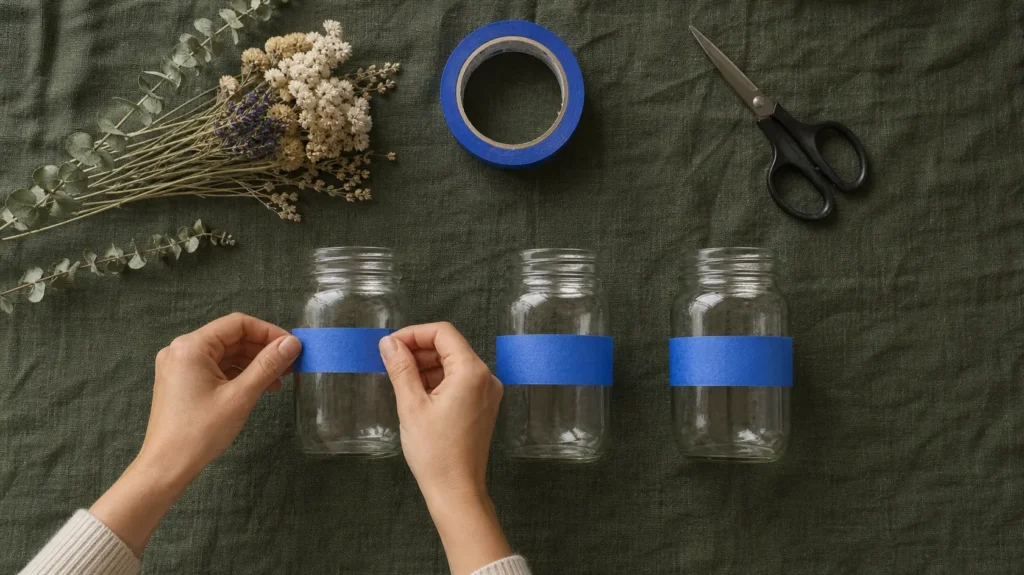
Wash the jars with warm soapy water, rinse them, and let them dry completely — paint will not stick to a damp or greasy jar. Then wrap painter’s tape around each jar in a simple design: one straight band around the middle, two thin stripes, or a wide band near the bottom. Press the tape edges down firmly with your finger so no paint creeps underneath.
Keep the design simple on your first jar. One clean band looks better than a complicated pattern that peels unevenly.
Step 2: Take the Jars Outside and Set Up to Spray
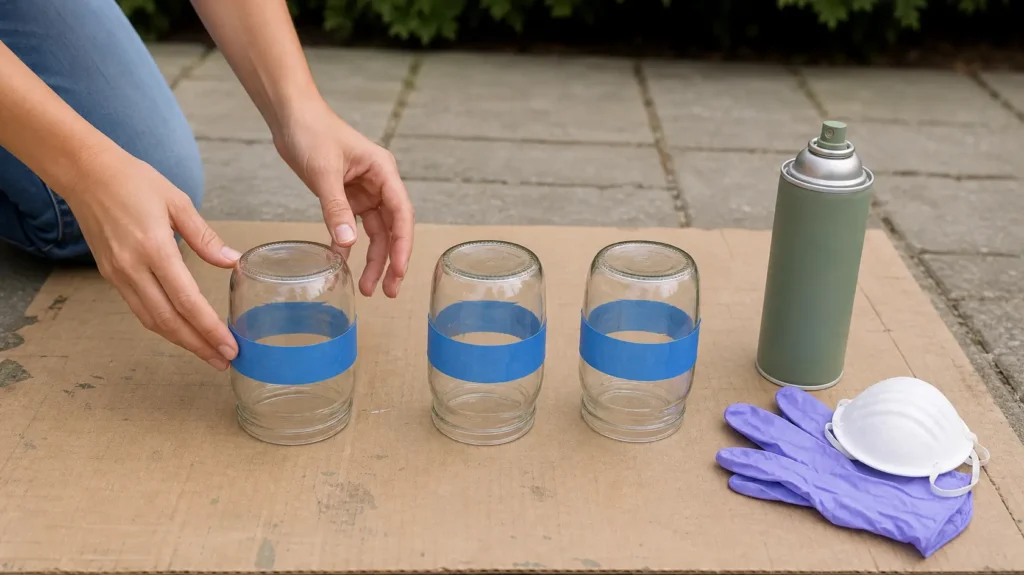
Lay the cardboard flat outside on a calm day — wind blows spray paint onto everything nearby. Put the taped jars upside down on the cardboard, a few inches apart, with the open end facing down. Put your gloves and mask on before you pick up the can.
Do the spraying step outside, even if the taping was done at the kitchen table. Spray paint indoors leaves a fine mist on walls, tables, and floors that is hard to clean.
Step 3: Spray in Light, Even Coats
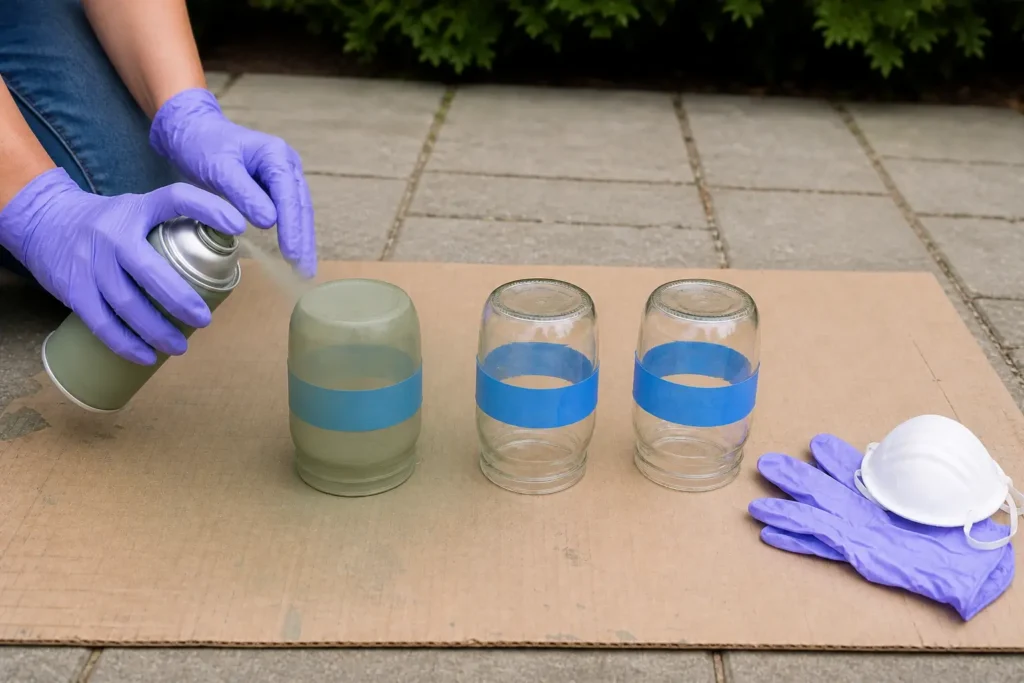
Shake the can well, hold it about 20 to 30 cm from the jar, and spray in slow, even side-to-side passes. Do one light coat over all three jars, wait for it to look dry to the touch, then add a second light coat. Two light coats cover better than one heavy coat, which drips and runs.
Do not try to cover the glass in one pass. If you can still see a little glass through the first coat, that is normal — the second coat fixes it.
Step 4: Let Them Dry, Then Peel the Tape
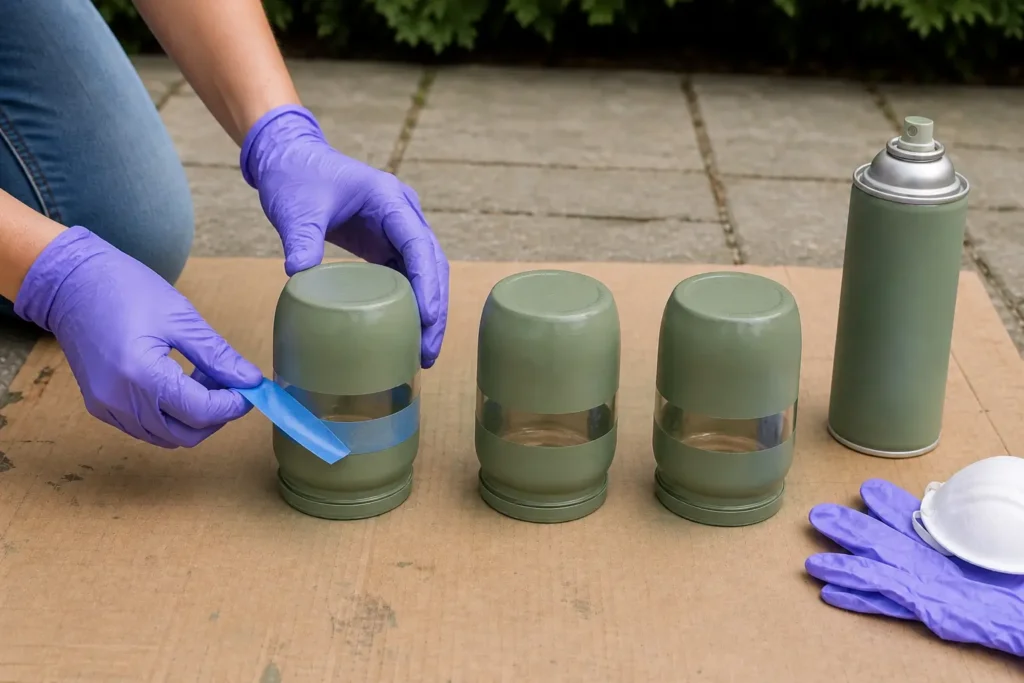
Leave the jars outside until the paint is fully dry — check the drying time on your can and do not rush it. Then bring them inside and peel the tape off slowly, pulling it back at a low angle. The tape leaves a clean stripe of clear glass where the paint did not reach.
If a little paint leaked under the tape, scrape it off gently with a fingernail once the paint is dry. Do not peel the tape while the paint is still wet — it will smear.
Step 5: Fill the Vases and Display Them
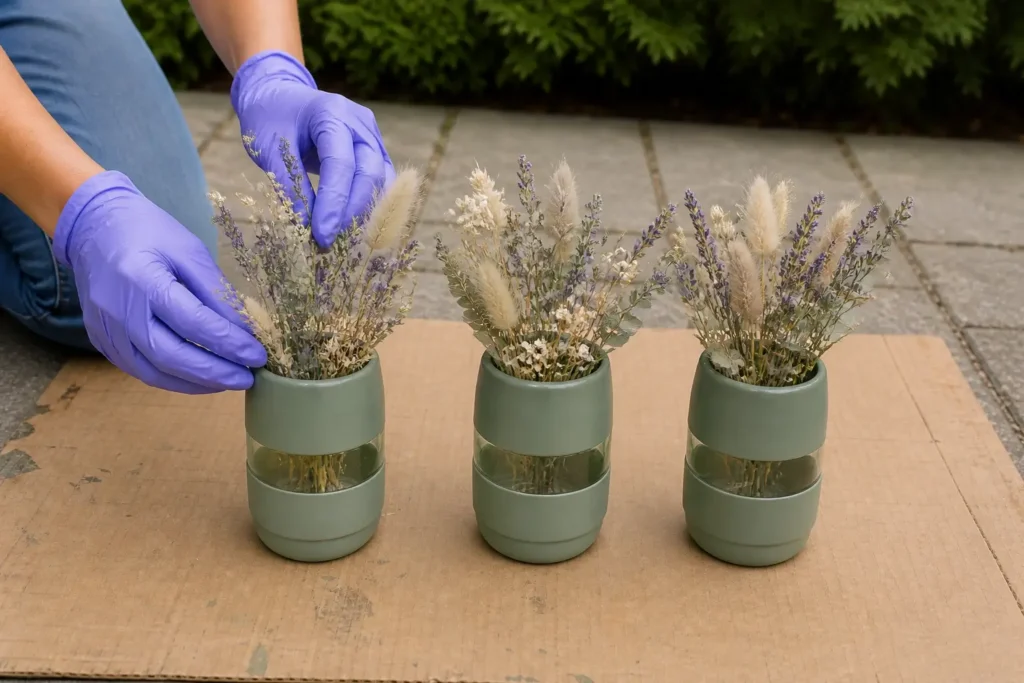
Put a small bunch of dried flowers or a few fresh stems in each jar. If you use fresh flowers, add water first. Stand the three jars together on a shelf, a mantel, or a dining table — a group of three in the same colour, with the clear stripes lined up, looks intentional rather than random.
Step back and look at them from across the room. That is how a guest will see them, and it is the best way to check whether the stripes line up.
Tips
- Use jars of the same size for a matching set. Mixed sizes work too, but keep the tape band at the same height on each one.
- Matte spray paint hides fingerprints and small imperfections better than gloss.
- If you want a softer look, spray one jar in a lighter shade of the same colour and mix it in with the other two.
- Store leftover spray paint upright, with the cap on, away from heat.
- Change the flowers with the season — dried flowers in autumn, fresh stems in spring — and the same jars look new again.
Variations
- Two-tone jars: tape the top half, spray the bottom one colour, let it dry, then tape the bottom and spray the top a second colour.
- Gold rim: after the main colour dries, tape just below the rim and spray a thin gold band around the top edge.
- Candle holders: use the same tape-and-spray technique on shorter jars, and put an LED tea light inside instead of flowers — never a real flame in a painted jar.
- Gift set: make three matching jars, tie them together with twine, and give them with a small bunch of dried flowers.
Frequently Asked Questions
How long do painted mason jar vases take to make?
About 15 minutes of active work — taping, spraying, and peeling — plus the drying time printed on your spray paint can. Most of the project is waiting for paint to dry.
Do I need to prime mason jars before spray painting?
For a decorative vase that sits on a shelf, no primer is needed if the glass is clean and dry. If the jar will be handled often or washed, a spray primer made for glass helps the paint last longer.
Will spray paint stay on glass?
Yes, if the jar is clean, dry, and greaseless before you spray, and you use light coats. Paint on glass can chip if it is knocked hard, so handle the finished jars by the unpainted stripe or the rim.
Can I wash painted mason jar vases?
Wipe them with a damp cloth rather than soaking them. Soaking and dishwashers will lift spray paint from glass over time. If you use fresh flowers, rinse only the inside with water and dry it straight away.
What flowers look best in painted mason jars?
Dried flowers and eucalyptus need no water and last for months, which suits a painted jar best. Fresh stems work too — just add water first and change it every few days.