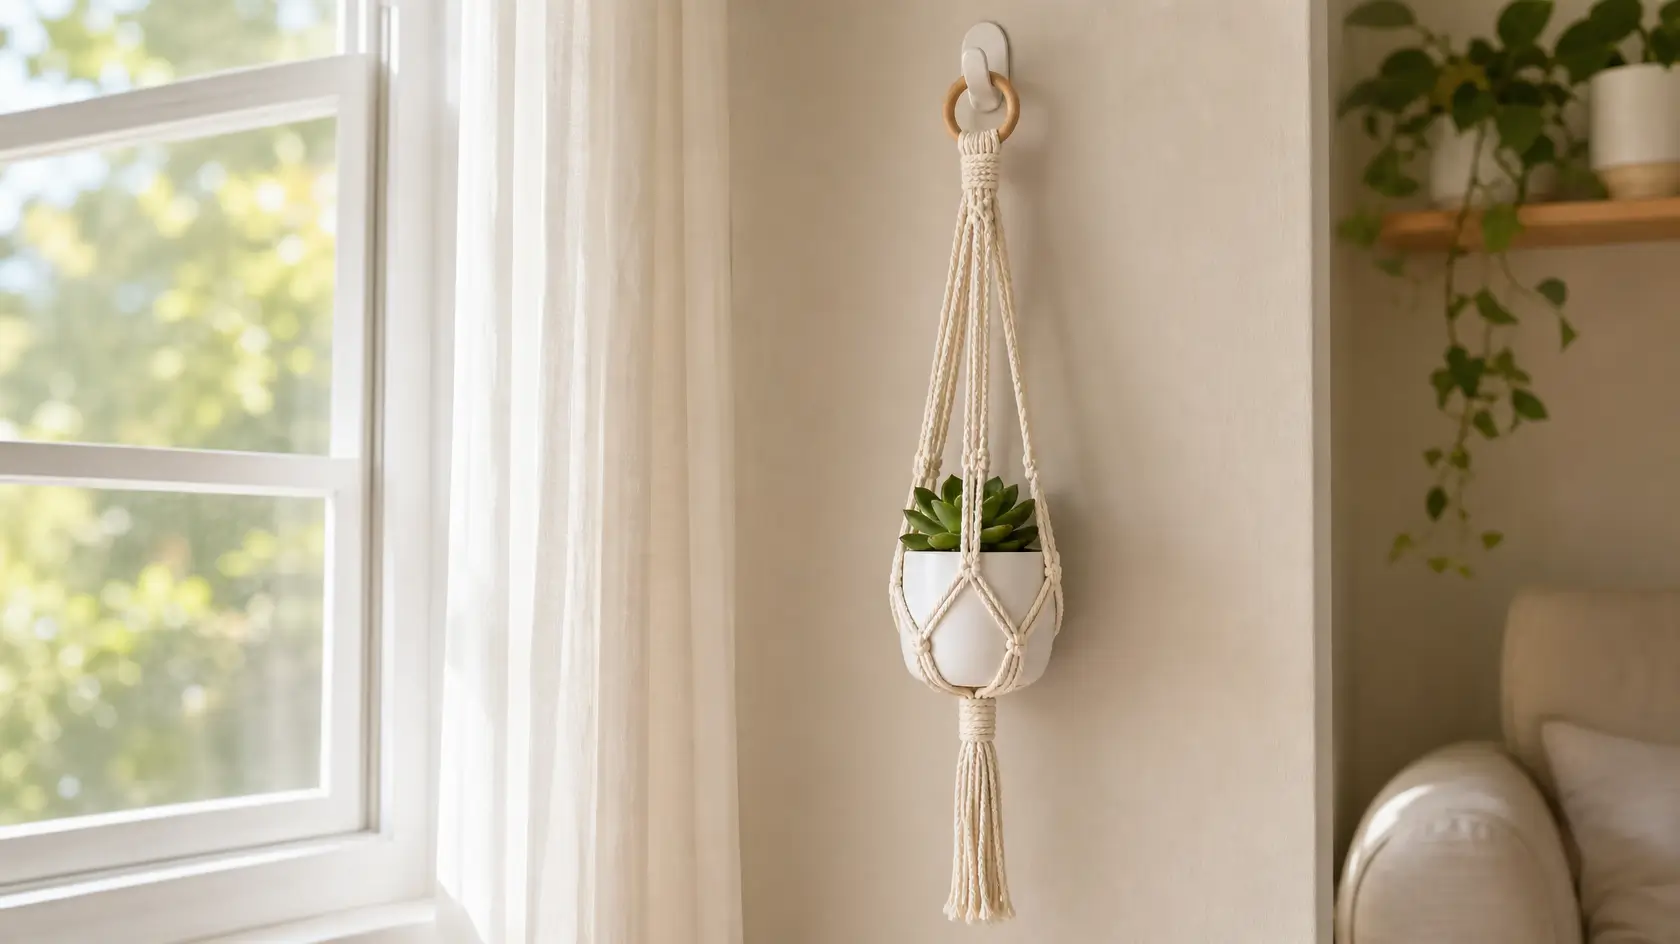
10-Minute Macrame Plant Hanger for Beginners (One Knot)
A 10-minute macrame plant hanger is made with one knot only — the gathering knot — and a macrame kit or pre-cut cords from your supplier. You loop the cords through a wooden ring, set a small plant pot inside them, and tie one gathering knot below the pot to hold everything together. It takes about 10 minutes, costs a few dollars, and needs no macrame experience, no pattern, and no knot chart.
This is the macrame project to start with. Most plant hangers ask you to learn three or four knots before you begin; this one asks you to learn one, and the plant does the rest. Make it in a morning, hang it by a window the same day, and your plant is off the table and in the light.
| Skill level | Beginner — no macrame experience needed |
| Active time | About 10 minutes |
| Drying / waiting time | None — hang it the same day |
| Hangers per batch | 1 plant hanger |
| Cost | A few dollars, plus one macrame kit or a set of pre-cut cords |
| Difficulty | Easy |
Safety first: use a light pot and a light plant only — a small plastic pot with an air plant or a small succulent, never a heavy ceramic pot. A heavy pot can slip out of the cords or pull the hanger down. Test the finished hanger first with an empty pot, then with the plant, and hang it from a hook that is fixed into the wall or ceiling, not from a curtain rail or a nail. Follow the weight limit on your macrame kit, and keep the hanger away from children who might pull it down.
What You Will Need
- 1 macrame kit for a small plant hanger, with pre-cut cords, one wooden ring, and one gathering cord — use the kit’s cords and its cutting guide, do not cut your own lengths
- 1 small, light plastic pot with a small plant — an air plant or a small succulent is best
- A pair of scissors
- A hook, fixed into the wall or ceiling, strong enough for the pot and plant
- A dark green fabric cloth as your work surface for the knotting steps
Step 1: Gather Your Materials and Loop the Cords Through the Ring
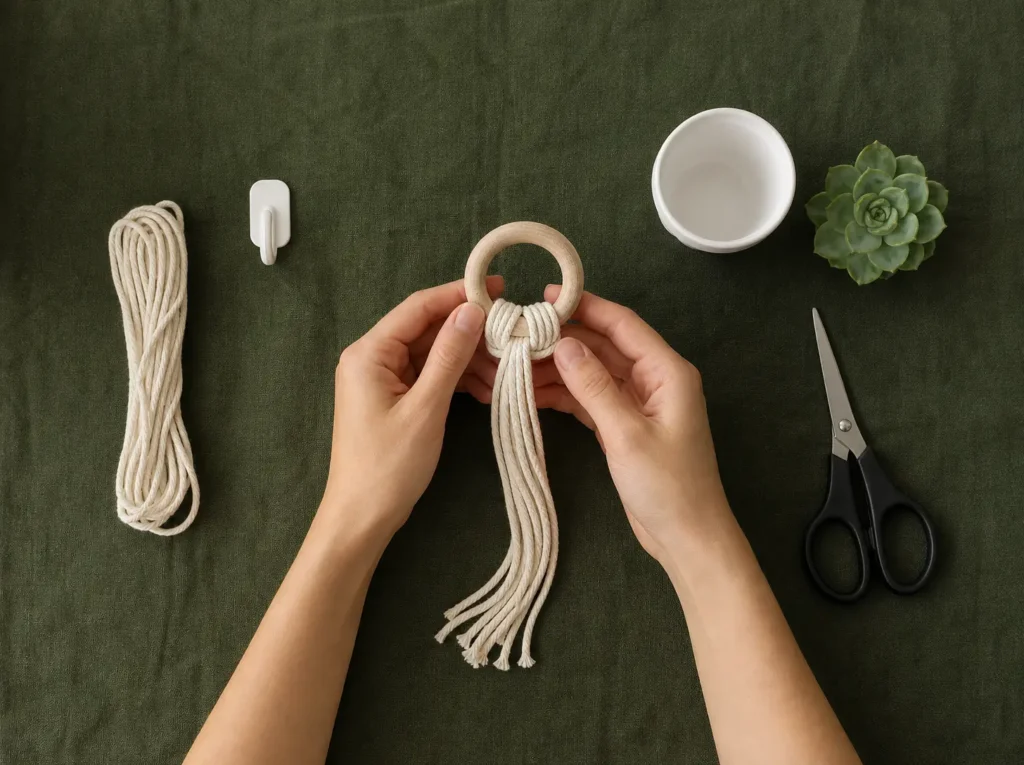
Lay everything out on the cloth before you start. Put the wooden ring in the middle, the kit’s cords beside it in a neat bundle, and the scissors, gathering cord, and small pot to one side. Fold the cords in half together, push the folded ends through the wooden ring, and pull the loose ends through the loop to make a lark’s head knot — the ring now holds all the cords.
Do this first and the knotting never has to stop while you search for a tool. A hanger left half-tied while you look for scissors will slip off the ring.
Step 2: Separate the Cords and Set the Pot Inside
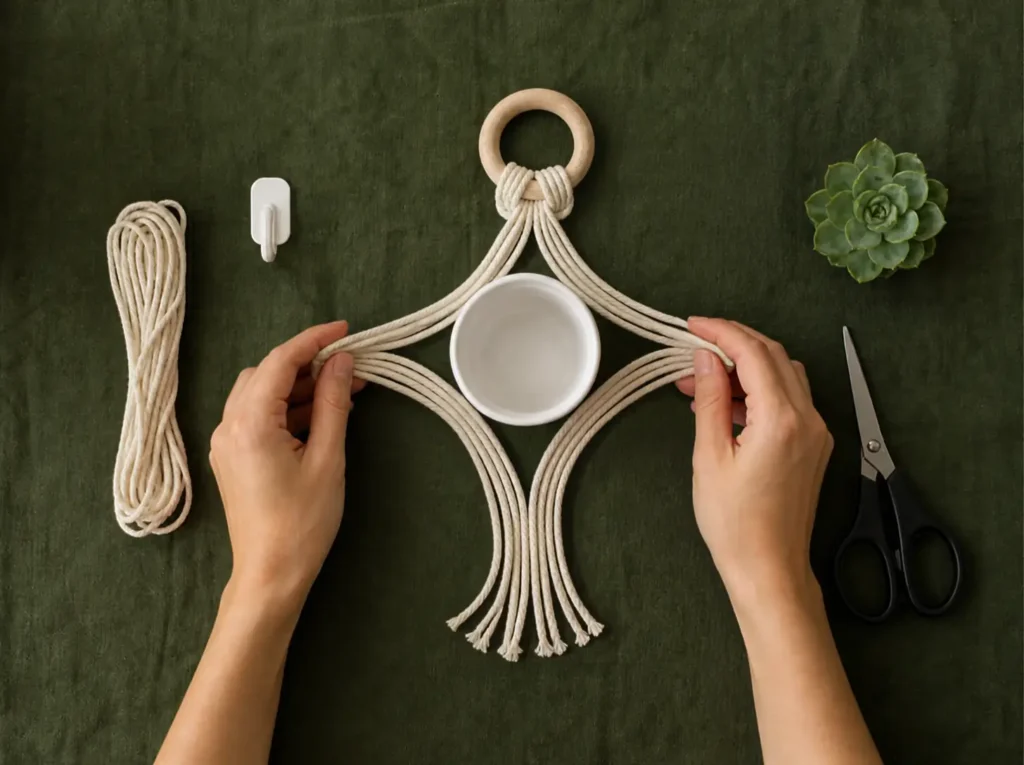
Spread the cords out on the cloth in a circle, like the spokes of a wheel, and set the empty pot in the middle of them, so the cords fall around the outside of the pot. Adjust the cords until they are evenly spaced — four groups, with a gap between each group, and the pot sitting level in the middle.
The pot must sit level before you tie anything. If it leans now, it will lean when it hangs, and no knot will fix a pot that was crooked from the start.
Step 3: Tie the One Gathering Knot Below the Pot
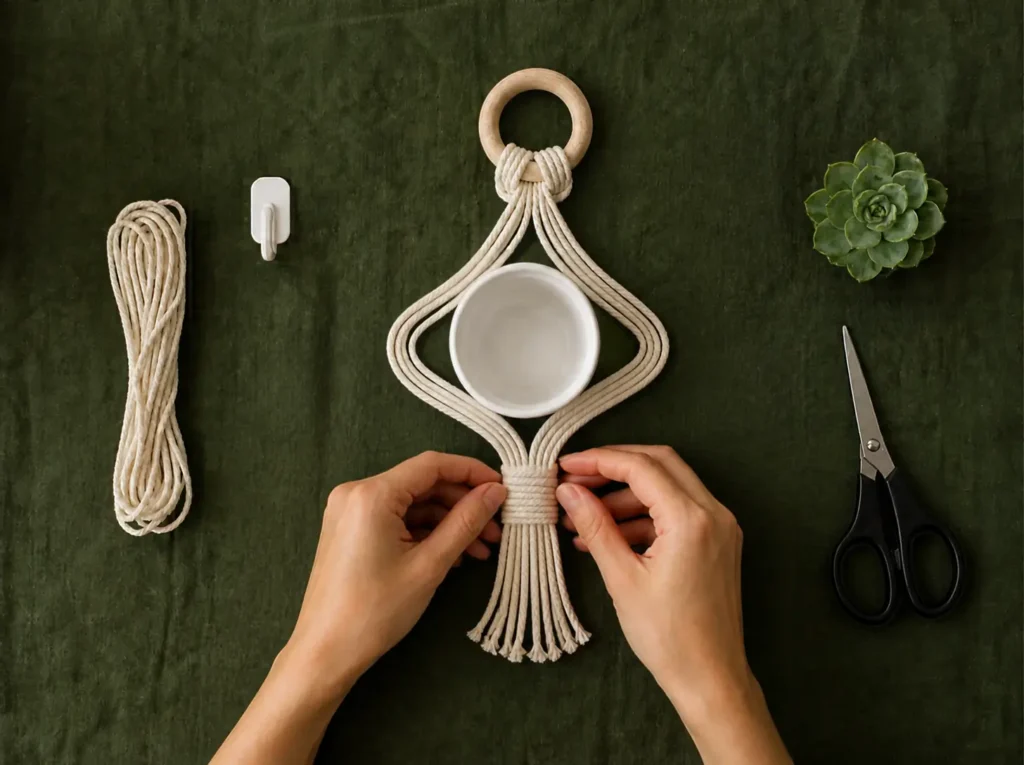
Gather all the cords together below the pot and tie the one knot of this project: the gathering knot. Wrap the gathering cord around the bundle several times, pull its end through the loop at the top, and pull the other end tight so the wraps sit in a neat band. Trim the loose ends of the gathering cord with the scissors, leaving a short, neat tail.
This one band is what holds the pot. Pull it tight, and check that the cords above it still fall evenly around the pot — if one group has slipped, undo the band and tie it again.
Step 4: Test the Hanger with the Empty Pot
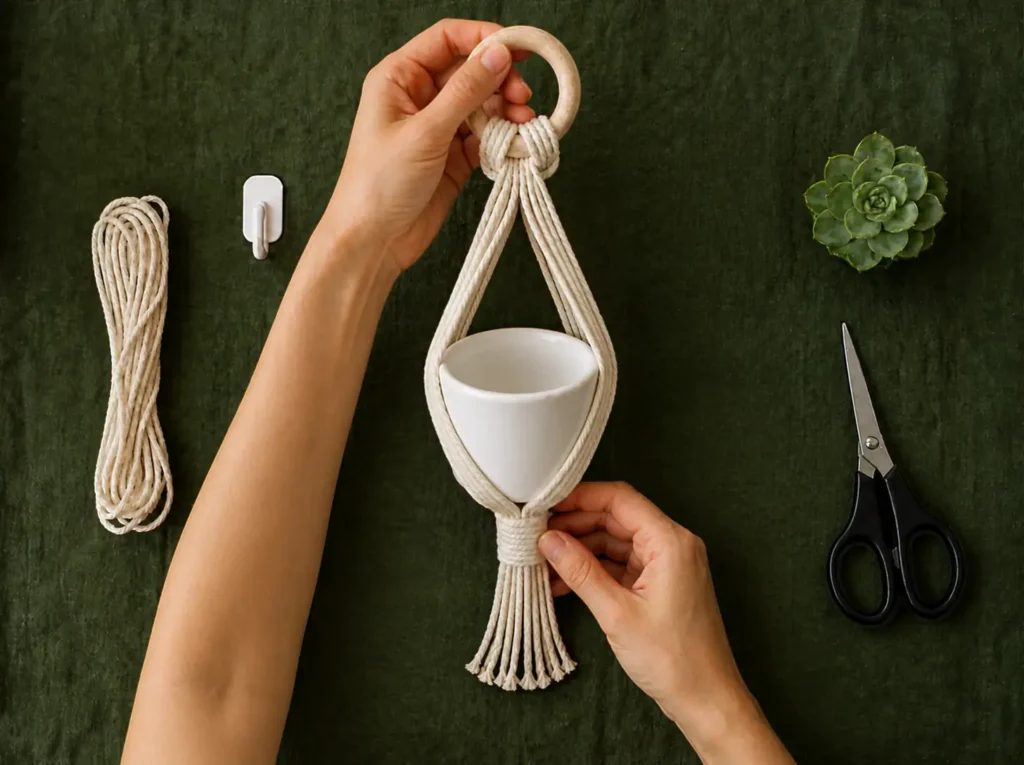
Lift the hanger by the wooden ring and let the empty pot hang in it. The pot should sit level, the cords should stay evenly spaced, and nothing should slip. Leave it hanging from your hand for a few seconds, then set it down and check the gathering knot — it should be tight and flat, not loose or bunched.
If the pot tilts, set it down and even out the cords again before you go further. Never test a hanger with a full pot first — always test with an empty pot, then add the plant.
Step 5: Add the Plant and Hang It by the Window
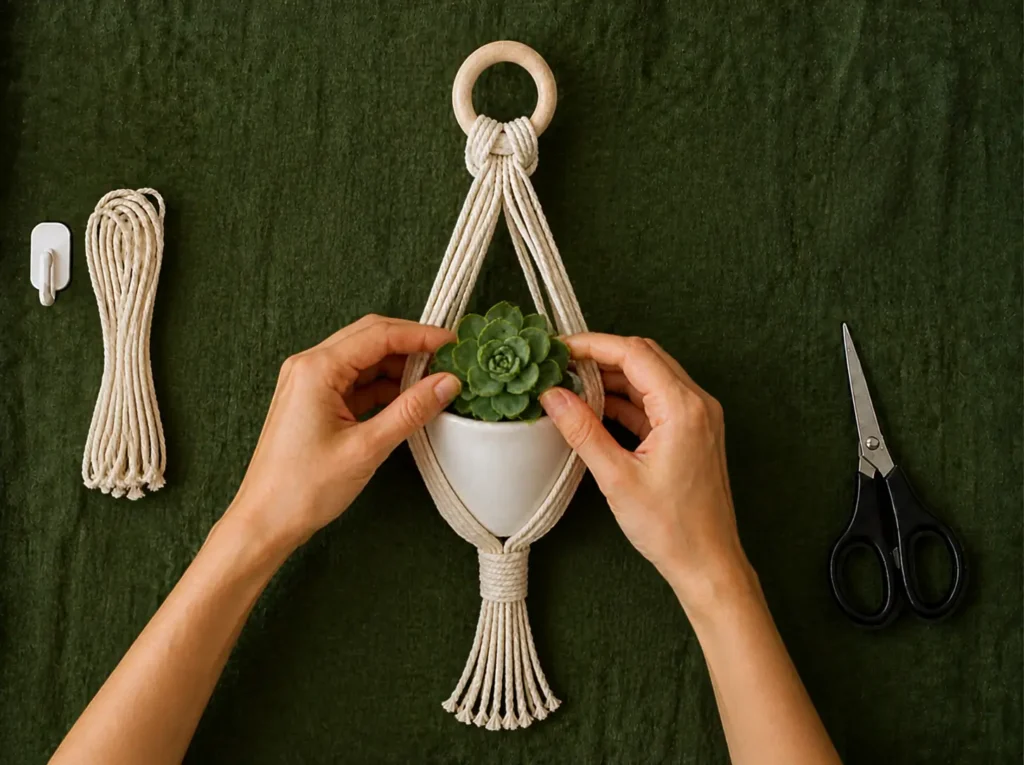
Put the small plant in the pot, set the pot back in the hanger, and lift the whole thing by the wooden ring. Hang it from the fixed hook by the window, step back, and check that it hangs straight and level, with the plant getting light from the window. Water the plant in place, with a small watering can, and let any drips fall onto a saucer or a tray underneath.
Leave it hanging. It is ready the same day, and the plant will tell you if it likes the spot — if it leans toward the window, the spot is right.
Tips
- Buy a kit, do not cut your own cords. Macrame cords must be cut to lengths that suit the pot, and the kit’s cutting guide already does that work for you. Cutting your own lengths is the most common reason a first hanger comes out too short or too long.
- Use a light pot. A small plastic pot with a succulent weighs almost nothing; a heavy ceramic pot can slip, and it can pull a weak hook out of the wall.
- Tie the gathering knot with the pot in place, not with the cords hanging empty. The knot must be tied at the right height below the pot, and you can only judge that height with the pot sitting in the cords.
- Hang it where the plant gets light, but not in direct midday sun through glass — a bright window with a little shade is best for a succulent or an air plant.
Variations
- Two-tone cords: use a kit with two cord colours — cream and sage green — and alternate the colours around the ring. The gathering knot in one colour ties the two together.
- Mini hanger: use the same one knot with a smaller ring and a tiny pot for an air plant. It hangs from a small hook and suits a desk or a shelf edge.
- Gift hanger: make the hanger, add the plant, and tie a small paper tag to the ring. It is ready to give as it is — no box needed.
Frequently Asked Questions
Do I need to learn macrame knots for this plant hanger?
Only one: the gathering knot, which is a wrap-and-pull band, not a patterned knot. The cords are held by the ring at the top and by the gathering knot at the bottom — there is no knot pattern to learn.
How long should my macrame cords be?
Use the lengths in your macrame kit, or the cutting guide from your cord supplier. Do not guess lengths or cut your own — cords cut too short will not reach around the pot, and cords cut too long will leave the pot hanging too low.
Can I hang a heavy ceramic pot in a macrame hanger?
No. Use a light plastic pot with a small plant. A heavy ceramic pot can slip out of the cords, and it can pull the hanger down. Test every hanger with an empty pot first.
Why does my plant hanger tilt to one side?
The cords are not evenly spaced around the pot. Set the pot down, spread the cords out again in four even groups, and tie the gathering knot again with the pot sitting level.
How do I water a plant in a macrame hanger?
Water it in place, with a small watering can, a little at a time, and put a saucer or a tray underneath to catch drips. Do not take the pot out of the hanger every time — lifting a wet pot in and out loosens the cords.