Paper Doily Angel Christmas Cards for Kids
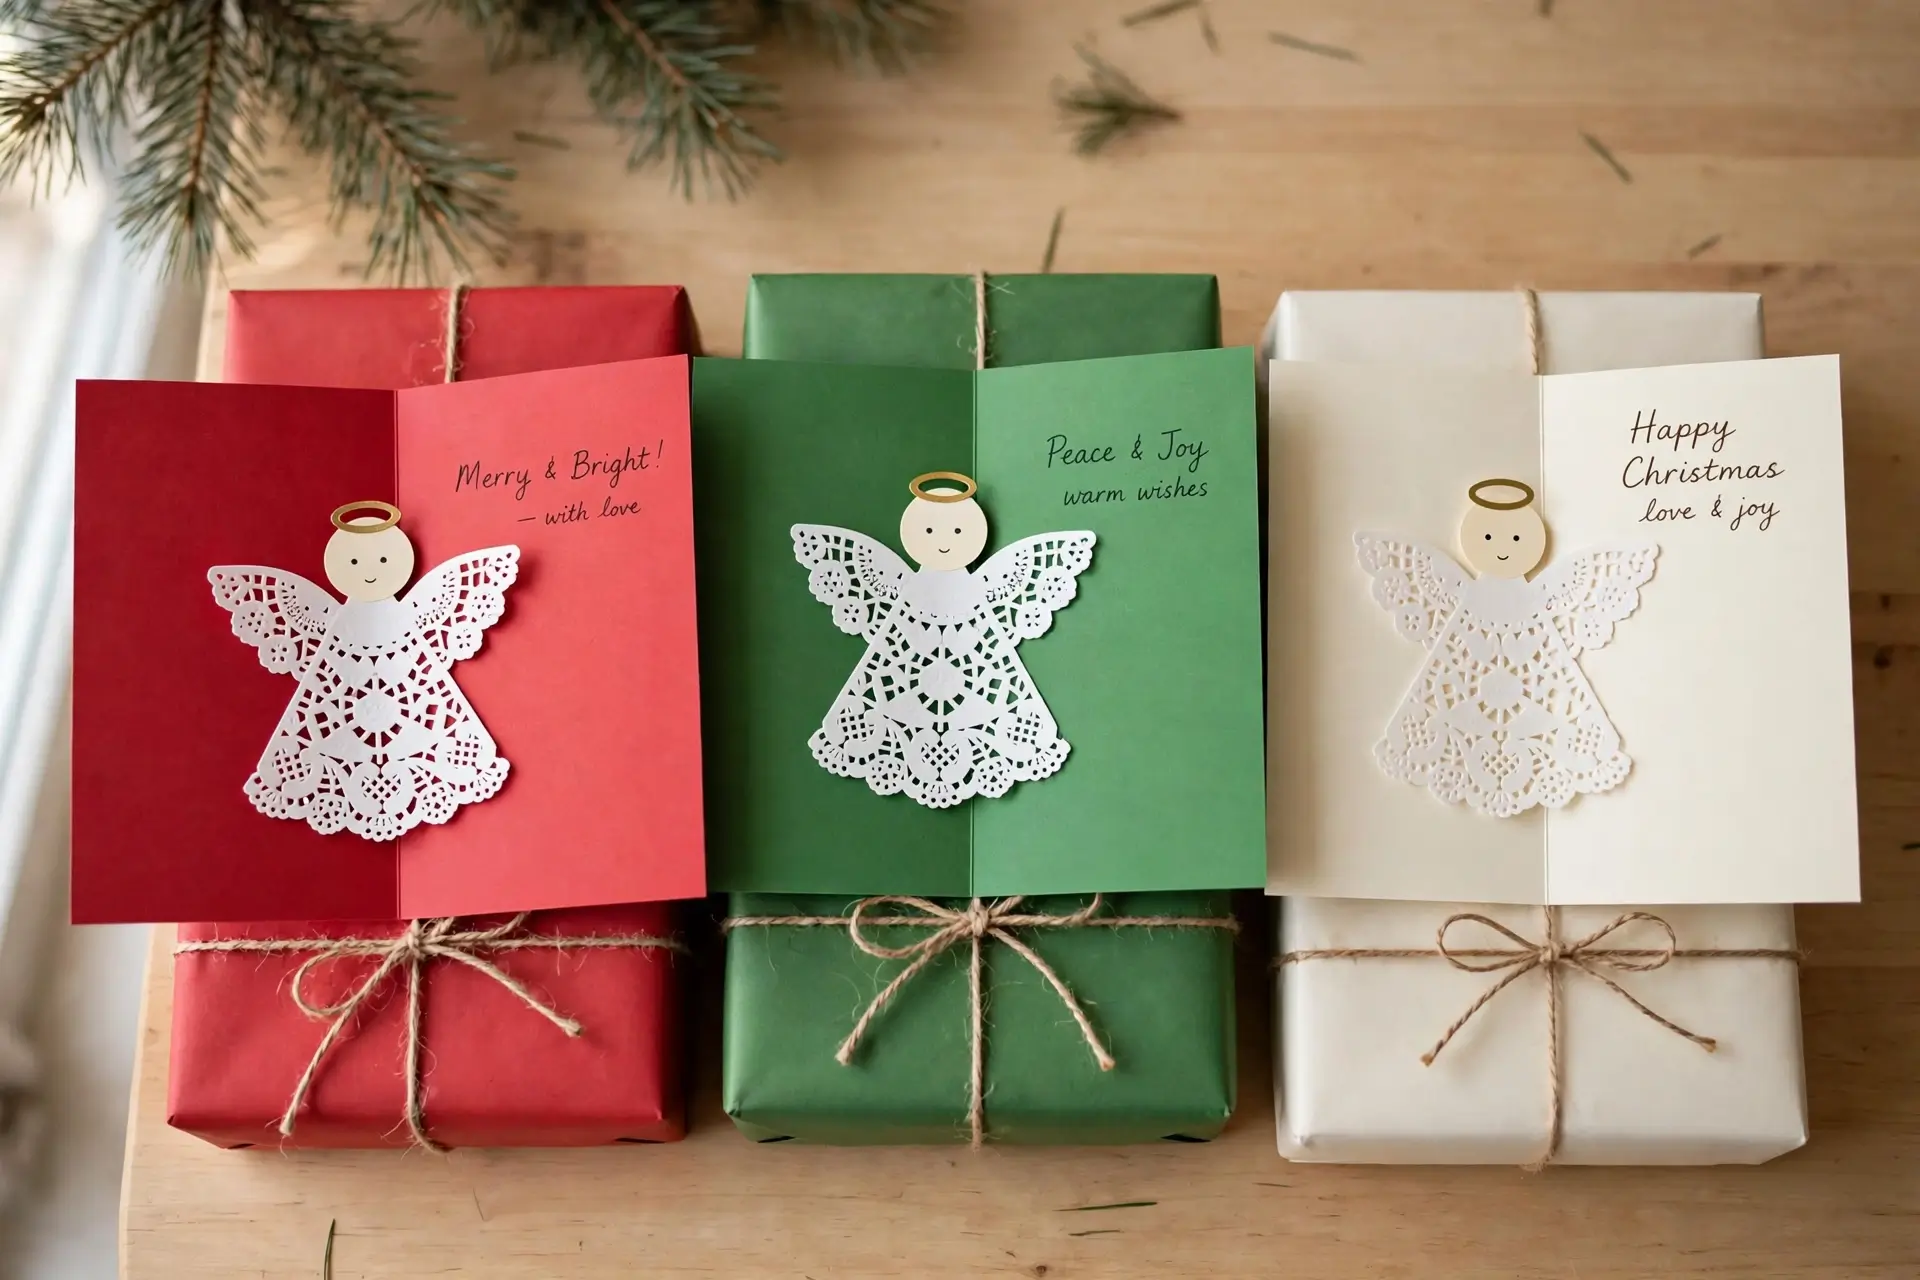
A paper doily angel Christmas card is a folded white paper doily glued onto a folded card to make an angel’s dress, with a paper circle for the head and a gold paper halo on top. It takes about 25 minutes, plus 10 minutes for the glue to dry, and it works best for ages 4 to 7. You need one doily, one folded card, and a glue stick per card, and a child can make three cards in one sitting.
These are the cards children actually give to people. They are flat enough to post in an envelope, pretty enough to stand on a shelf, and simple enough that a 4-year-old can make one without help after the first fold. Make them in the first week of December and they are ready to send well before Christmas.
| Ages | 4 to 7 |
| Time | About 25 minutes, plus 10 minutes drying |
| Difficulty | Easy |
| Cards per sitting | 3 |
| Cost | About $1 per card |
Safety first: an adult should cut the small halo circle, because it is too small for a child’s fingers to hold safely. The child does the folding, gluing, and drawing. Use a glue stick, not liquid glue, so the card does not go soggy.
What You Will Need
- 3 white paper doilies, about 8 inches across — one per card
- 3 sheets of coloured cardstock, A4 size, folded in half — red, green, and cream work best
- Cream or skin-tone card for the heads
- Gold or yellow card for the halos
- A glue stick
- Child-safe scissors
- A black marker, fine tip
- Crayons or coloured pencils in brown and yellow
- A dark green fabric cloth as your work surface
Step 1: Gather Your Materials
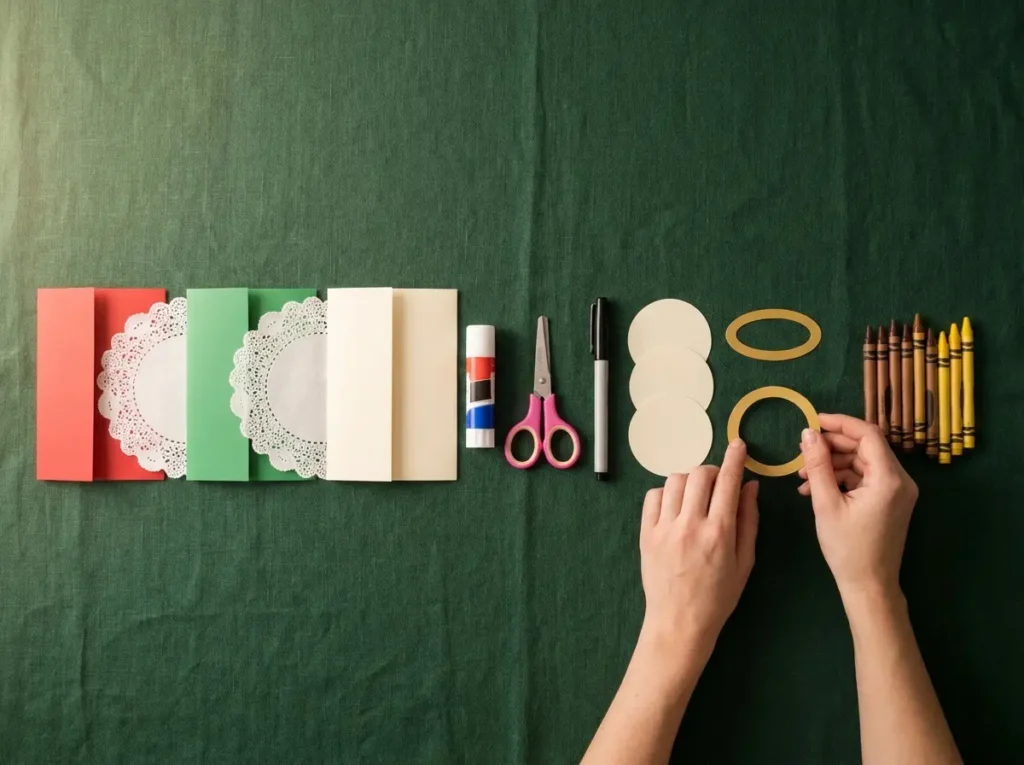
Lay everything out on the cloth before you start. Put the three folded cards in a row, with the doilies beside them, and the glue stick, scissors, and marker in front. Cut three head circles, about 2 inches across, from the cream card, and three halo rings, about 2.5 inches across, from the gold card, before the child starts. Put the crayons in a small pile to one side.
Do this first and the child never has to wait for you in the middle of the craft. Waiting is when the glue stick gets opened and closed twenty times.
Step 2: Fold the Doily into the Angel’s Dress
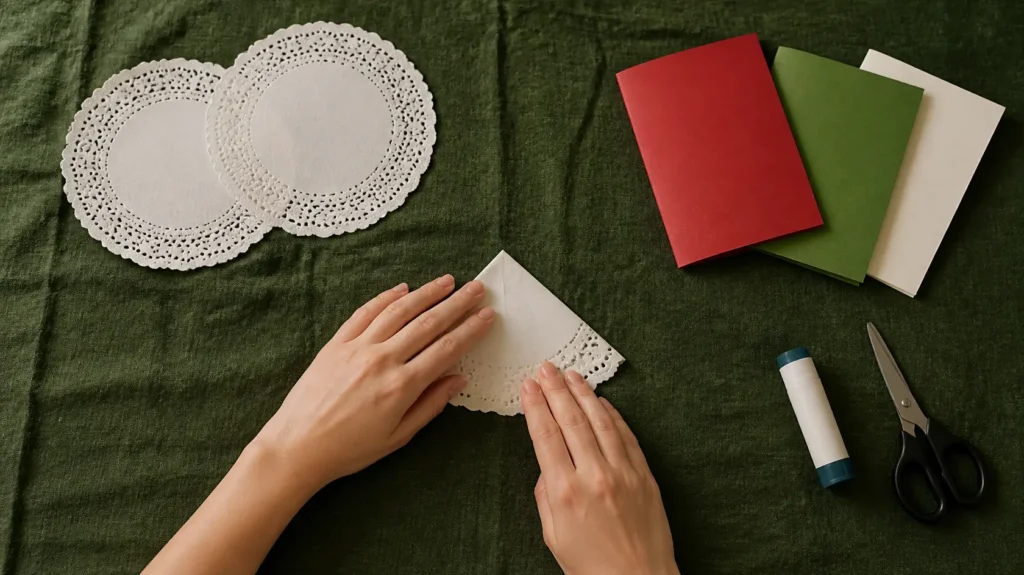
Take the first doily and fold it in half, scalloped edge to scalloped edge. Then fold that half in half again, so you have a quarter circle with a point at the top and a wide scalloped edge at the bottom. Open it out once, so it is a half circle again — that half circle is the dress, wide at the bottom and narrow at the top.
Press the fold flat with your hand. If the doily springs open, put a small dab of glue stick on the fold and press it again for ten seconds.
Step 3: Make the Head and the Halo
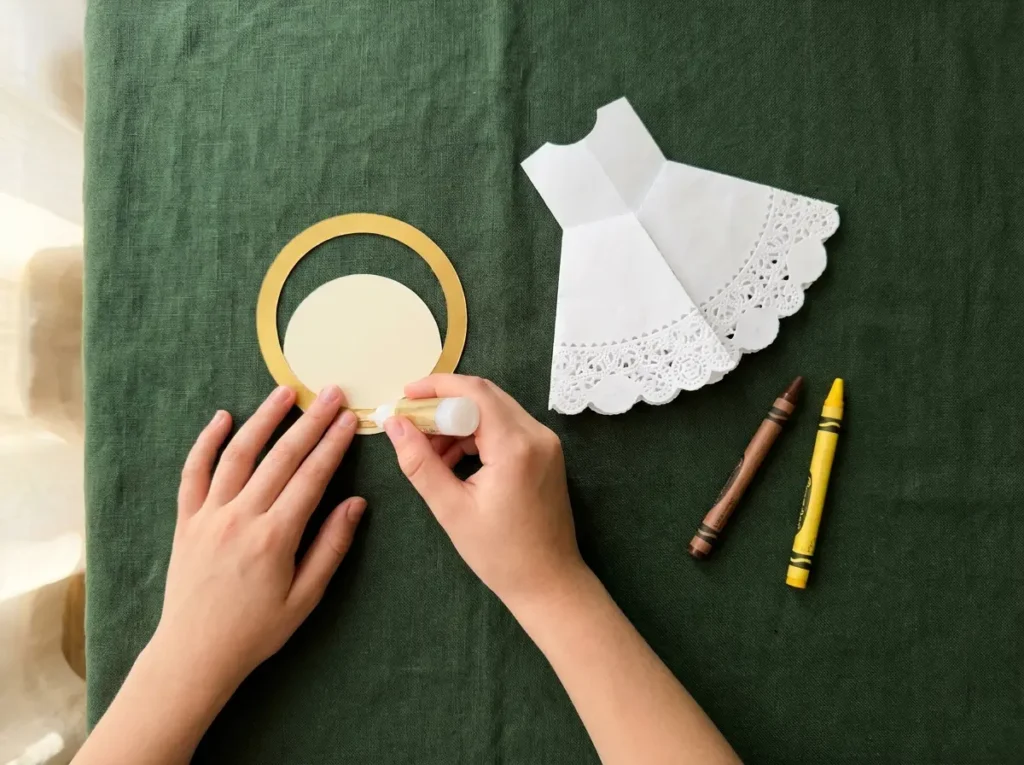
Take one cream head circle and one gold halo ring. Glue the halo to the back of the head circle, so just the top half of the ring shows above the head, like a crown. Let the child draw the hair with a brown or yellow crayon — a few curved lines across the top of the head is enough.
Do not draw the face yet. The face is easier to draw after the angel is glued to the card, when the head is flat and still.
Step 4: Glue the Angel onto the Card and Draw the Face
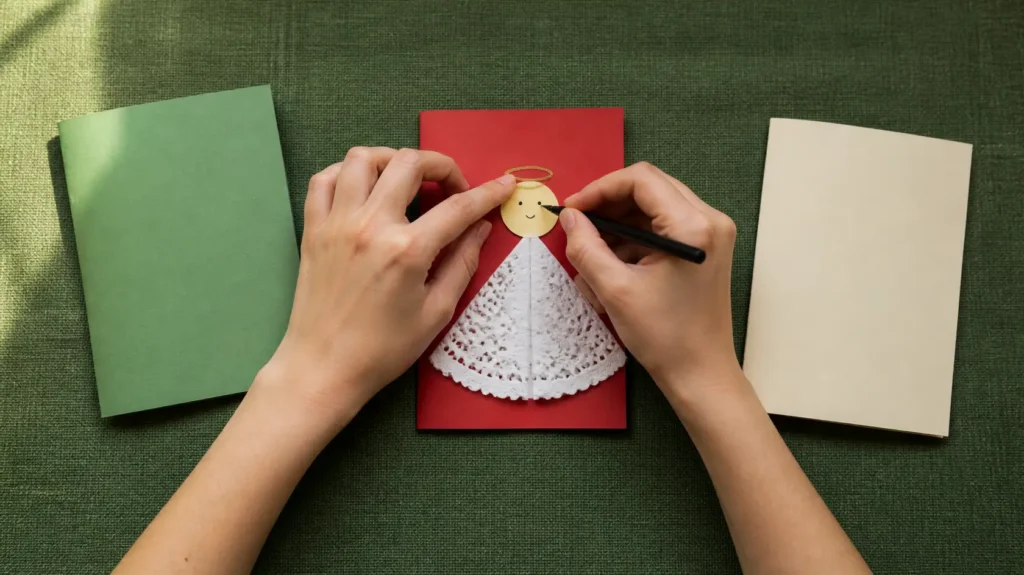
Put a generous line of glue stick down the centre of the front of the folded card. Press the folded doily onto it, point at the top, scalloped edge at the bottom. Then glue the head on top of the point of the doily, so it overlaps the dress by about half an inch, with the halo showing above it.
Now draw the face. Two small dots for eyes and one small curved line for a smile, with the black marker. That is all it needs. A big face, or a face drawn before the gluing, is the one thing that makes these angels look wrong.
Step 5: Add the Greeting and Let the Cards Dry
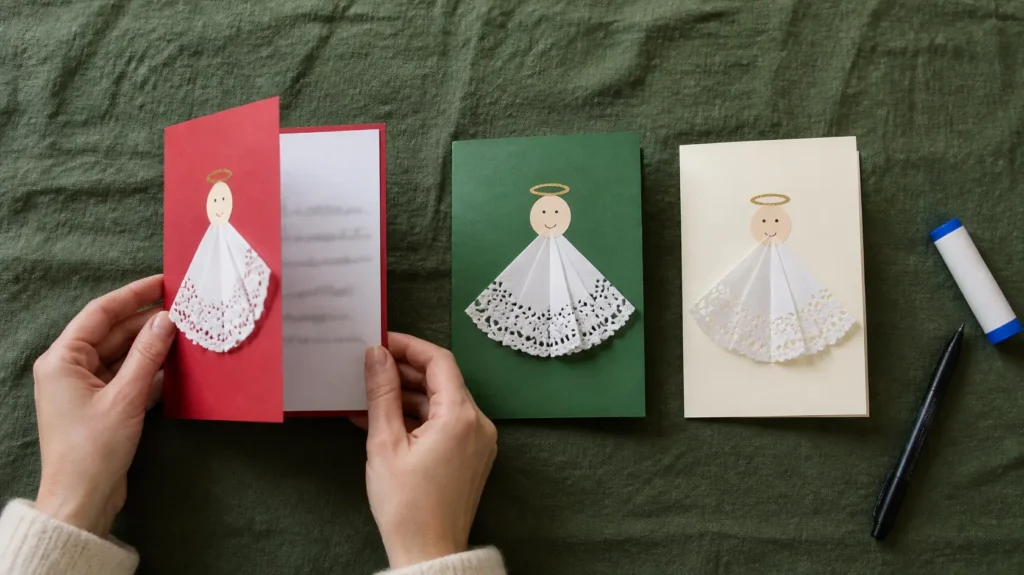
Open the card and write the greeting inside, in the child’s own handwriting — “Merry Christmas” is enough, or just their name. Leave the cards open and flat on the cloth for 10 minutes so the glue dries. Do not close a card while the glue is still wet, or the angel will stick to the inside.
When they are dry, stand the three cards in a row. The red card, the green card, and the cream card look like a little choir of angels, and that is the moment to take the photo for the fridge or the wall.
Tips
- Buy doilies with a deep scalloped edge. Flat-edged doilies make a dress that looks like a plain triangle.
- If a doily tears while folding, do not start again. Glue the torn piece flat and fold the other side over it — nobody can tell once the head is on.
- Make the cards in a batch of three. The first one teaches the child the folds, the second one is the neat one, and the third one is the one they give away.
- Write the greeting inside before you glue the angel on the front, if the child presses hard when they write. A hard pen can dent the front of the card.
Variations
- Snow angel: use a silver or white card and a blue crayon for the hair, and add a tiny paper star in the angel’s hands.
- Family set: make one angel per family member, in different card colours, and write each person’s name inside their card.
- No doilies? A white coffee filter, folded the same way, makes a softer dress with a ruffled edge. It tears more easily, so an adult should do the first fold.
Frequently Asked Questions
Can a 3-year-old make this?
Yes, with help. A 3-year-old can glue the doily and draw the face. An adult should do the folding and cut the halo.
How long do the cards take to dry?
About 10 minutes with a glue stick, if the cards are left open and flat. Liquid glue takes 30 minutes and can wrinkle the card.
Can I post these cards in the mail?
Yes. They are flat, and the angel is only one doily thick. Put the card in an envelope with the angel facing the back of the envelope, so the postmark does not press on it.
What can I use instead of paper doilies?
White coffee filters work, folded the same way. White tissue paper does not — it tears when you fold it twice.
Do I need real gold paper for the halo?
No. Yellow card works just as well, and a gold crayon on white card works too. The halo only needs to be a different colour from the head.